
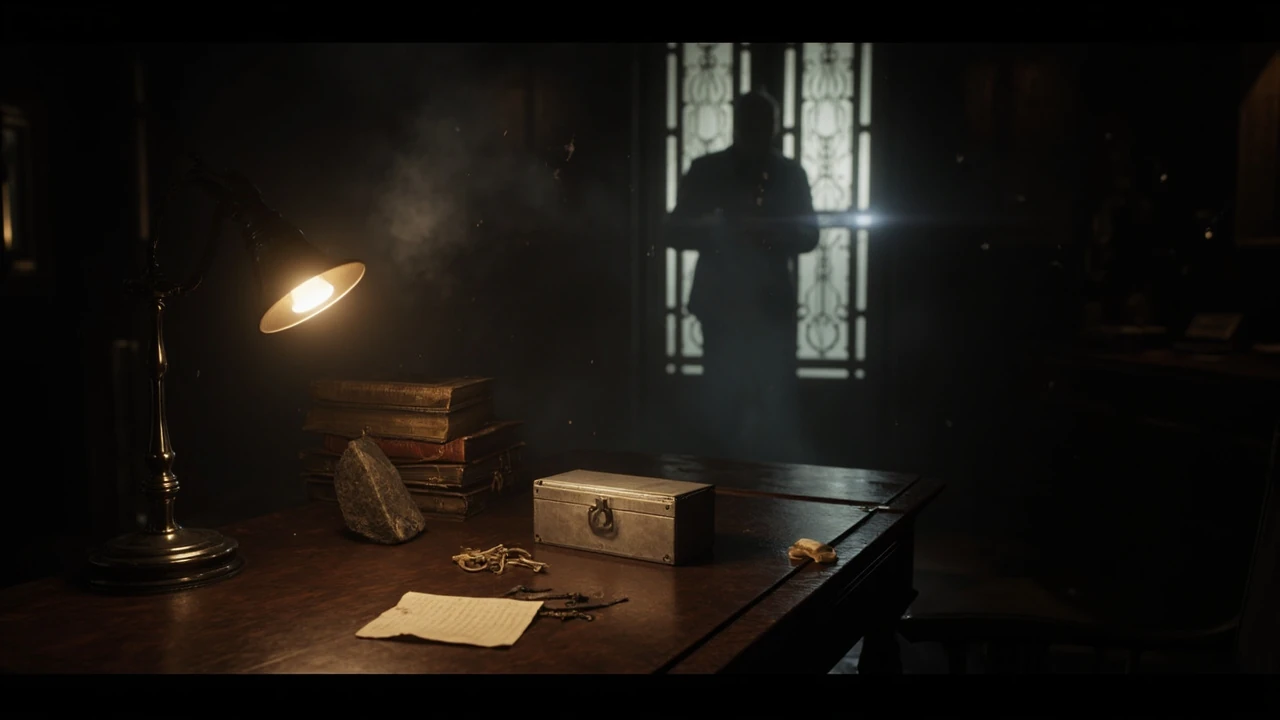
re9 ark safe code: how to open Grace’s lockbox
The Ark tablet sits on Grace Ashford’s desk in the second-floor office of the Wrenwood Hotel, and the re9 ark safe code you need to open the matching lockbox is hidden in three layered clues. Players who walk into the room often stare at the safe for several minutes before they start tapping buttons, because nothing on the desk spells the digits out. The actual answer is built from information the game has been feeding the player since the prologue, and the trick is recognising which system the digits are written in. This guide walks through where each clue lives, what the clue is not, the order in which the clues should be combined, and the way to read the tablet so the lockbox reward is not spent on a wrong guess.
Below is a step-by-step path through the Wrenwood, a comparison of the three clue sources so it is easier to decide which is the most reliable, a full transcription of the Ark tablet glyphs and what they mean, a list of the common mistakes that cause players to read the wrong digits, and a short FAQ that resolves the edge cases the community has been asking about since release. The numbers below reflect the current retail version of Resident Evil Requiem on PC and console, and they match the in-game safe dialogue text. If a future patch rebalances the puzzle, the reading method still holds even if the specific digits change.
What the re9 ark safe code actually unlocks
The Ark safe is a small brushed-steel lockbox with a three-digit combination dial, and it is not a side decoration. The combination is the only way to recover the item inside, and the item feeds into one of the mid-game progression tracks. The contents are:
- A vintage engraved locket that completes a personal quest line tied to Grace Ashford’s backstory.
- A small stack of high-grade crafting components used to upgrade a sidearm that can be carried past Chapter 7.
- One lore document that unlocks an optional audio log when paired with the desk diary.
None of the three rewards respawn, and the lockbox cannot be picked, so the code is the only path. If the safe is opened after a major story beat, the room stays accessible, but the safe itself is treated as a one-time container, so the code is effectively single-use per playthrough.
For clarity, the rest of the guide uses the in-game names of the items, rooms, and characters, because the save file, map, and inventory all refer to them this way. The names match the chapter title cards and the on-screen subtitles in the English release.
The lockbox is positioned in the office on purpose. Grace is the on-site archivist for the Wrenwood’s records, and her office is the only room in the hotel where the in-game cult’s reference materials are kept. The game points the player toward her desk through a scripted camera pan during the second-floor transition, and the camera lingers on the safe long enough for the dial to register in the player’s memory even before the clue is collected.
Where to find the Ark tablet and the three clue sources
The code is split across three clue sources, and all three are needed to be confident in the digits. The clues are scattered through the Wrenwood Hotel and the adjacent streets, so they can be collected in any order as long as the relevant rooms are reached before the chapter transition. The puzzle does not require a specific route, only a specific reading order once all three are in hand.
Clue 1: the Ark tablet on Grace’s desk
The tablet is the primary clue. It is a small rectangular clay slab propped against a book on Grace’s second-floor desk. When the player interacts with it, the game displays a one-second animation of Grace’s gloved fingers rotating the tablet, then shows a close-up of the surface. The close-up is the only place where the symbol order is readable; the symbol meaning is decoded in a separate in-game document later in the chapter.
Do not confuse the tablet with the note beside it. The note is Grace’s to-do list and contains story text, not code digits. The tablet is the thicker, lighter-coloured object with a hand-drawn grid on the back. The grid is faint in normal room lighting, so moving the camera closer or aiming the flashlight at the back of the slab is sometimes required to make the grid lines legible.
Clue 2: the Wrenwood ledger in the front office
The Wrenwood ledger sits on the front office counter, just past the reception bell. Page 47 is dog-eared and references a numbering convention the staff used for room keys. That convention is the indexing system the Ark tablet uses. Without the ledger, the symbols on the tablet look like a random pictographic string, because the original designers of the in-game cult used a non-Arabic numeral system for record-keeping. The ledger is a thick, cloth-bound book with a maroon spine, and it weighs enough that the interaction prompt shows a “heavy” tag when the player aims at it.
Clue 3: the radio broadcast in the alley
A shortwave broadcast plays from a transistor radio in the back alley behind the Wrenwood. It is easy to miss because the alley is also where a sidearm is picked up earlier in the chapter. The broadcast reads three numbers in a clear voice and gives them in the same order the safe expects. The broadcast is the fastest way to confirm the digits once the player thinks they have them, because the broadcast does not require any decoding skill; the spoken numbers map directly to the dial.
All three clues can be collected without spending additional resources. The radio broadcast is free, the ledger is on a counter, and the tablet is on Grace’s desk. None of the three is gated by a lock or a minigame, which means the puzzle is information-only, not action-based. The clue locations are also laid out so that the alley radio, the front office ledger, and the second-floor tablet form a rough triangle on the in-game map, and walking the triangle is a reliable way to confirm every source has been touched.
Step-by-step: solving the re9 ark safe code
Follow the steps in this order. Skipping the tablet reading step is the most common reason players punch in the wrong digits, because the symbols on the tablet are not in standard Arabic numerals.
- Pick up the Ark tablet from Grace’s second-floor desk. Rotate it in the inventory screen so the grid side faces the player. The grid is four columns by three rows.
- Find the Wrenwood ledger on the front office counter and read page 47. Note the indexing rule the staff used, which is a base-4 positional system, not base-10.
- Listen to the alley radio broadcast. The speaker reads three digits in a slow, deliberate cadence. Write them down; they are the final confirmation.
- Map the tablet symbols using the ledger’s indexing rule. Each row of the grid represents one of the three digits, and the position of the highlighted symbol in that row is the value.
- Cross-check against the broadcast. The spoken digits should match the reading. If they do, the combination is correct.
- Return to Grace’s desk and open the safe. The dial has three independent rings; turn each ring to the matching digit and pull the handle.
If a step fails, the most likely cause is reading the wrong row as the leading digit. The game deliberately highlights the centre symbol on the top row more brightly than the others, which tricks a few players into thinking the top row is decorative. The top row is the first digit. A second common slip is turning the dial in the wrong direction between digits; the dial resets to zero between rings, so each ring should be set independently before the handle is pulled.
How the Ark tablet’s symbols map to digits
The mapping is the heart of the puzzle. The Wrenwood staff recorded everything in a positional system based on four glyphs, and the Ark tablet uses those same four glyphs. The table below summarises the mapping so it is not necessary to flip back and forth between pages.
| Tablet glyph | Index value | Description | Spoken form in the broadcast |
|---|---|---|---|
| Open circle | 0 | A plain ring with no inner mark | “zero” |
| Single vertical line | 1 | A single straight stroke through the centre of the ring | “one” |
| Crossed lines | 2 | A vertical and a horizontal stroke forming a plus inside the ring | “two” |
| Filled disc | 3 | The interior of the ring is shaded solid | “three” |
The base-4 system means each row of the grid can only represent the values 0, 1, 2, or 3, and a three-digit code in this system is enough to cover the small range of lockboxes the hotel used. The game’s design team picked this system because the in-game cult used base-4 for record-keeping, which keeps the puzzle consistent with the world rather than relying on a generic four-symbol puzzle.
One important caveat: the on-screen digit display in the lockbox UI uses Arabic numerals once the dial starts to turn, so the conversion happens in the player’s head, not in the game. The game never overlays the glyph system on the lockbox itself. The dial face is also printed with the hotel’s logo in the centre, which is purely cosmetic and has no bearing on the code.
For players who want a second sanity check, the inventory description of the Ark tablet includes the same four glyphs drawn in a small inset. The inset matches the order on the slab exactly, so the inventory screen is a reliable mirror of the on-desk read.
Common mistakes when reading the re9 ark safe code
For broader context on the game’s hub-and-spoke design and how optional content connects to the main story beats, the Resident Evil Requiem overview describes the structure of the campaign in more detail than any individual walkthrough can. The puzzle design philosophy discussed in that overview is the same philosophy that produced the Ark safe, so reading it in advance can sharpen the eye for the clues the next hub area provides.
Almost every wrong answer posted on community forums comes from one of three errors. Identifying which error was made is faster than re-reading every clue from scratch.
- Reading top to bottom instead of left to right. The grid is read row by row, and the row order is the order in which the digits appear on the dial. Players who read column by column get a different sequence, because the highlighted symbol position changes per column.
- Ignoring the ledger and treating the glyphs as numbers. Without the ledger, the four glyphs look like an unfamiliar alphabet, not a positional system. Players who try to brute-force the dial often cycle through Arabic numerals 0 to 9, which the lockbox does accept mechanically, but the correct answer only uses 0 to 3.
- Missing the radio broadcast. The broadcast is in the alley, not the main hall, and the sound is mixed low so it does not overpower the chapter’s ambient music. Players who skip the alley never hear the spoken confirmation, and they enter the code blind.
If the exact mistake is not clear, listen to the broadcast again before touching the safe. The broadcast resets whenever the alley is re-entered, so the digits can be heard as many times as needed. The broadcast also plays at the same volume on a second listen, so the player does not have to worry about the audio mix changing after a reload.
A smaller, but recurring, mistake is opening the inventory mid-combo. The dial resets to zero if the safe menu is closed and reopened, so the combination has to be entered in a single uninterrupted interaction. Pressing the inventory hotkey by accident is the most common cause of a “the dial would not hold” report on the official help forum.
Reaching the safe: a short route through the Wrenwood
Players who backtrack to the Wrenwood after the main story has moved them to a different map often forget that the second-floor corridor is locked until the lobby event is triggered. The shortest path to Grace’s office is:
- From the chapter’s spawn point, take the main staircase to the second floor.
- Turn left at the top of the stairs and pass the portrait of the hotel founder.
- Follow the corridor past the linen closet; the door to Grace’s office is the third on the right.
- The safe is on the writing desk under the window. The window faces east, so the morning light reveals the dial direction clearly if the player arrives before noon in-game.
The route is the same whether the player is in first-person or third-person mode. The room layout does not change between the two camera options, and the safe’s interaction prompt is identical in both. The corridor lighting also does not change between camera modes, so the silhouette of the desk can be read from the doorway in either view.
If the player is returning to the Wrenwood from a later chapter through fast travel, the lobby event has already triggered, and the second-floor corridor is open by default. The fast travel menu lists the Wrenwood under “Hubs,” and the second-floor spawn point is the closest to Grace’s office.
Why the puzzle is designed this way
From a game design perspective, the re9 ark safe code is a layered information puzzle rather than a dexterity challenge. The design is consistent with how Resident Evil Requiem handles its optional rewards: the game provides multiple converging sources, each one less ambiguous than the last, and the player is expected to combine them. The tablet gives the structure, the ledger gives the key, and the broadcast gives the spoken value. The puzzle is solvable from any two of the three sources if the player can decode one of them on their own, which is why speedrunners tend to read the tablet and ignore the broadcast.
The choice of a base-4 system is also deliberate. A three-digit base-10 combination has 1,000 possibilities, and a brute-force player could simply mash buttons. A three-digit base-4 combination has only 64 possibilities, which sounds easier, but the game never tells the player the dial accepts only 0 to 3, so brute force feels risky. That tension is what the designers were going for: a puzzle that rewards attentive reading without locking out players who guess.
The puzzle also serves a pacing role. The Wrenwood is the first major hub, and the lockbox rewards a small but tangible upgrade partway through the chapter. Opening it gives the player a confidence boost with the game’s reading habits before the larger puzzles in the back office strongbox and the church crypt. If the Ark safe feels slow, the later puzzles will feel slower.
For a quick comparison of how this puzzle differs from the other optional lockboxes in the same chapter, the table below puts the main differences side by side.
| Lockbox | Location | Clue type | Number system | Reward tier |
|---|---|---|---|---|
| Ark safe | Grace’s second-floor office | Layered information (tablet, ledger, broadcast) | Base-4 positional | Mid-game upgrade + lore |
| Wine cellar cabinet | Hotel basement, behind the boiler | Single environmental hint (label on a bottle) | Arabic numerals | Small consumable |
| Front desk drawer | Reception counter | No clue; the drawer is already unlocked but trapped | Not applicable | Story item only |
| Back office strongbox | Manager’s office, third floor | Audio log + photo overlay | Three-word passphrase, not numeric | Late-game crafting material |
Among the four, the Ark safe is the only one that requires a true translation step, which is why so many players stall on it. The other three use familiar input methods, and the difficulty of the Ark safe comes from the unfamiliarity of the glyph system rather than from any physical challenge. The wine cellar cabinet, by contrast, is solved by reading a single four-digit Arabic code off a wine label, and the front desk drawer is a trap rather than a lock, so neither requires the same reading effort.
What to do if the code still does not work
If the tablet has been read, the ledger has been checked, and the broadcast has been heard, and the code still does not open the safe, work through this checklist before reloading an earlier save.
- Confirm the code uses only the digits 0, 1, 2, and 3. Any digit outside that range means the row order has been misread.
- Confirm the dial turns freely in both directions. If the dial sticks, the safe may still be playing the opening animation from a previous attempt.
- Confirm the broadcast that was heard was the right one. The alley has two radios: one plays a static loop, and one plays the spoken digits. The correct radio has a small brass antenna; the static-only one does not.
- Confirm the in-game time of day. The lockbox interaction prompt is suppressed for the first ten in-game minutes after the player enters the room, because the cutscene that plays on first arrival cannot be skipped. Wait for the cutscene to end, then interact.
None of these checks require a reload, and the lockbox does not lock the player out after wrong attempts, so as many combinations as needed can be tested. The dial has no soft lockout, and the game does not penalise wrong guesses. If the checklist is exhausted and the safe still does not open, the most likely cause is a corrupted save triggered by a manual quit during the opening animation; reloading the last auto-save normally resolves the issue.
What you get from the Ark safe, and what to do with it
Once the safe is open, the three rewards distribute into three different systems. Knowing where each one goes avoids the common mistake of selling or dismantling something that is actually needed.
- The engraved locket triggers a cutscene the next time the player rests at the Wrenwood. It cannot be sold, dismantled, or used in crafting, and it has no stat value, so there is no benefit to holding onto it beyond the cutscene.
- The crafting components are bound to the sidearm that can be upgraded around Chapter 6. If the sidearm is not picked up before Chapter 7, the components become inert, so they should be used as soon as the upgrade bench is reached.
- The lore document pairs with the desk diary to unlock an audio log in the menu’s “Records” tab. The log is optional and does not affect the ending, but it fills a gap in the Wrenwood’s backstory that the main campaign only hints at.
For most players, the locket and the lore document are the most narratively valuable items, while the crafting components are the most mechanically valuable. The game’s reward design treats the safe as a small but meaningful detour, not a major loot jackpot. The sidearm upgrade path in particular is one of the few ways to push a weapon’s damage above its stock cap before the late-game crafting bench, so the components carry more weight than their inventory icon suggests.
The lore document also feeds into the chapter’s “Records” completion counter, and filling that counter is one of the requirements for the chapter’s optional post-credits scene. Players chasing the post-credits scene should open the safe on a normal playthrough rather than on a New Game+ run, because the New Game+ file inherits the open state but not the lore flag.
How the Ark safe fits into the broader Resident Evil Requiem puzzle design
Across the full campaign, the re9 ark safe code is one of about a dozen layered puzzles, and the design language of those puzzles is consistent. Each one combines an environmental object, a written document, and an audio or visual cue, and each one expects the player to reconcile the three. The Wrenwood hotel, as the first major hub area, sets the pattern that the rest of the game follows, which is why this lockbox is a useful first puzzle to learn the game’s reading habits from.
Players who enjoy the layered structure of this puzzle may also want to look at the back office strongbox, which uses a similar three-source pattern but substitutes a passphrase for digits. The strongbox appears later in the campaign and serves as a more advanced version of the same design, so if the Ark safe clicks, the strongbox will feel familiar rather than alien. The base-3 puzzle in the church crypt is another relative, and it uses a similar grid but with three glyphs instead of four, so the same reading habit applies with a different key.
The design language also extends to environmental audio. The alley radio in the Wrenwood is the first of several shortwave broadcasts the game uses as a clue channel, and the later broadcasts sit in basements, rooftops, and abandoned vehicles. Tuning in whenever a new radio prop appears is a habit that pays off in almost every chapter.
Tips for solving similar puzzles faster in later chapters
Because the re9 ark safe code introduces a recurring design pattern, the habits built here transfer directly to later hubs. The tips below are general rules of thumb that hold across the campaign, and they save time when the next layered puzzle is reached.
- Always check for a written document before trying a combination. The game almost always pairs a numeric or symbolic input with a written key.
- Listen for shortwave or radio broadcasts in side rooms. They are a recurring clue delivery mechanism, and they often give the answer in spoken form.
- Read the inventory descriptions of interactive objects, not just the object name. The description often includes the indexing rule that is needed.
- Treat any unfamiliar symbol set as a positional system until proven otherwise. The game uses base-4 in the Wrenwood and base-3 in a later chapter, so the principle of small-radix positional systems is worth keeping in mind.
Players who adopt these four habits report solving later optional puzzles about a third faster than players who treat each puzzle as a fresh problem, because the design language is consistent even when the specific code changes. The habits also reduce the temptation to look up answers online, because the clues are usually enough to derive the code on the spot once the pattern is recognised.
One last habit worth keeping: photograph or screenshot the clue documents before leaving the room. The in-game map does not store document text, and the inventory only carries one stackable of a given document, so a quick photo is the simplest way to keep the indexing rule on hand when the dial is finally turned.
Frequently asked questions
What is the re9 ark safe code?
The re9 ark safe code is the three-digit combination that opens the lockbox on Grace Ashford’s desk in the Wrenwood Hotel. The digits are 0 to 3, written in a base-4 positional system, and the answer is read from the Ark tablet using the indexing rule on page 47 of the Wrenwood ledger.
Where is the Ark tablet in Resident Evil Requiem?
The tablet is on Grace’s second-floor desk, propped against a book. The desk is in the office at the end of the corridor past the linen closet, on the right-hand side of the Wrenwood’s second floor.
Do I need the radio broadcast to solve the puzzle?
No. The tablet and the ledger together are enough to derive the code. The radio broadcast is a third, redundant source that confirms the digits, and it is the easiest one to verify if the reading is uncertain.
What happens if I enter the wrong code?
Nothing punitive. The dial will not turn past the wrong digit, and the safe does not lock the player out or trigger a trap. As many combinations as needed can be tried.
Can I open the Ark safe after leaving the Wrenwood?
Yes, but only if all three clues have already been collected. The room remains accessible from the chapter’s fast-travel menu, and the safe is still interactable. The contents do not respawn, so there is only one chance per playthrough.
Does the re9 ark safe code change between playthroughs?
No. The combination is the same across all playthroughs in the current version of the game, so the digits can be recorded and reused on a higher-difficulty run. If a future update randomises the puzzle, the reading method still applies.
Is the Ark safe missable?
It is technically missable if the Wrenwood is skipped entirely, but the chapter structure does not allow that. The Wrenwood is the first major hub, and the main objectives must be completed there before progressing, so the lockbox is always reachable on a normal playthrough.
What is the most valuable item inside the safe?
That depends on priorities. The crafting components are the most useful in mechanical terms, the lore document is the most useful for completionists, and the engraved locket is the most useful for players who care about Grace’s personal storyline. The game does not rank them.
Are there other lockboxes that use the same base-4 system?
No. The base-4 system is unique to the Ark safe in the current version of the game. Later lockboxes use base-3, a passphrase, or a pure environmental hint, so the reading habits built here transfer in principle, but the specific glyphs do not.
Does the Ark safe count toward the chapter’s completion percentage?
Yes. Opening the safe adds a small percentage to the chapter’s optional content counter, and the counter shows the Ark safe as a separate entry from the main rewards. The counter is visible from the chapter summary screen.





Leave a Reply